

After a week of nerves, hyper-acidity, ankle issues, I DID the Mt. Suswa Hike and I am honestly giving myself huge taps on the back for having completed it because I did get cold feet and I had thought about backing out so many times leading up to last Saturday.
I had even lined up excuses, valid reasons as to why it wasn’t such a good idea, in case anyone dared to ask why I didn’t pull through after being particularly loud-mouthed about it;
“Oh, my ankles”.
“Oh, it’s not such a good idea to go hike up a random mountain, with no experience at all… after all, I am no wonder woman”.
“Oh, I’m going to get my ass fried out there, my body will give in and they will have to carry me! Too embarrassing”
“Oh, I thought against having to pee in a bush; what if I come across a mountain lion with a particular case of irritation caused by my excretion of ammonia in her backyard?”
But, early Saturday morning, at about 0530 hrs, I was up, nervously ploughing through my bowl of breakfast oats, waiting on Diana to come by my flat and pick me in the cab we were sharing to the City Centre and to the meeting point at Kencom.
I did the hike with two colleagues; Diana (who, by the way, was my inspiration) and Eric (who is such that cool dude and did not hesitate when I approached him with the idea).
-
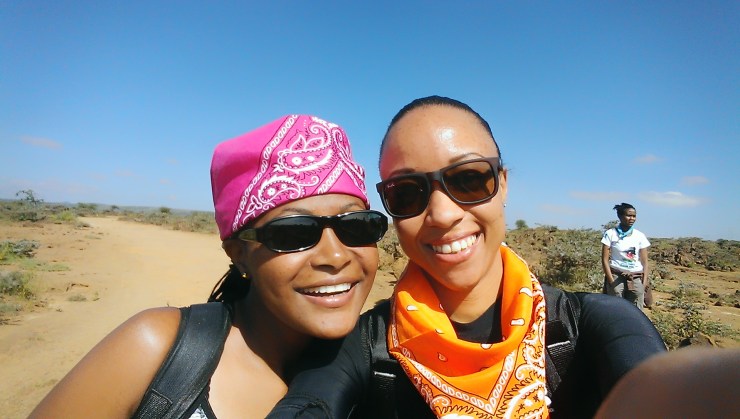
Diana & I. Please notice that Diana’s forehead is covered while my BIG one is literally tapping high-fives to the Suswa sun. (Current situation is a darkened, molting forehead).
-
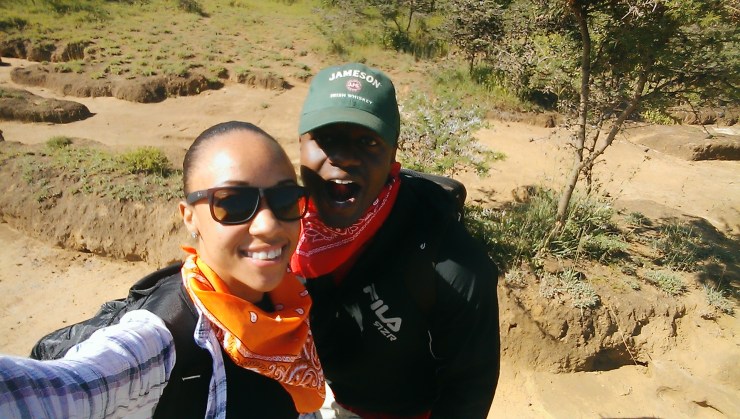
Eric & I. Again, there goes your girl with her unprotected forehead.
We were a convoy of 4 buses and we left for the Mt. Suswa Conservancy at about 0645 hrs, arriving there a little after 0830 hrs after a short stop over at the View Point at the escarpment along the Nairobi – Nakuru – Naivasha highway.
-
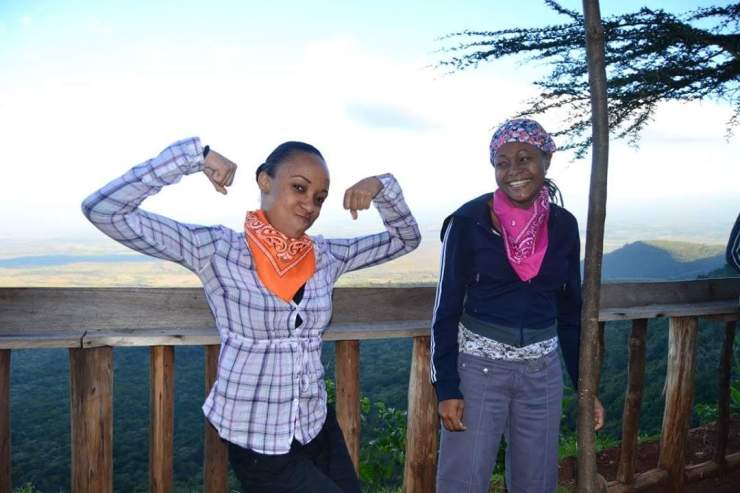
I think I was trying to do the Hakka dance.
Sad truth is, I don’t have a play by play account of the Hike.
So here is a quick, sweet and short synopsis (with a few tips from what I learnt from my novice hike): They don’t call it a “Rim Challenge” loosely.
You are expected, should you submit yourself to test your body’s limits, to complete the 30KM (18.64 Mile) of an incline to the Summit and the subsequent circumnavigation of the outer crater of Mt. Suswa.
Yes. All that, crazy right?
Volcanic Suswa stands at a beautiful 2,356 m (7,730 ft) above sea level, boasting a double crater with lava tubes and caves that are renowned for the Baboon Parliament.
The easiest route to hike Madam Suswa is Rauch’s trail, which I believe is the route we used.
The trip’s main goal was an acclimatization hike for the brave souls planning to conquer Mt. Kenya and Mt. Kilimanjaro in August and September later in this year.
The rest of us novices and curious folk were there to test our limits and begin preparation for a lifetime of backpacking adventures. And challenging hikes like Mt. Kenya and Mt. Kilimanjaro (which are on my bucket list).
The Rim Challenge will take you about 9-10 hours, depending on your pace.
We approached the Summit from the North – East side, starting at the Mt. Suswa Primary School after a quick warm-up session. It was a 9 hour experience of glaring heat and a massive workout for the quads. (We started the hike at about 0930 hours and completed at about 1830 hrs).
Good thing is that it’s a steady ascend for the first 6 hours or so, with a few steep sections of volcanic rock and outcrops as you approach the Summit.
I remember relentlessly telling myself; “Keep going. Don’t look up. Don’t look back. Just focus on the ground ahead of you.” And it worked.
At the last leg approaching the summit, it gets pretty darn steep. Getting to the summit took about 6 hours so the descent was quite the relief as it was much shorter (we were at the campsite where the buses were waiting in about 1 and a half hours).
Blatant truth; it is also not very scenic until you’re higher up the mountain and the panoramic views of the inner crater get you off-guard: it’s absolutely breathtaking! Most of the work you will do will involve managing your backpack over the steep sections, but, thankfully, there will be enough energizing breaks in between where you will get to catch your breath (and this is if you’re either with the first group or in the middle group (like us).
The slower paced hikers hardly get the chance to rest sufficiently, sadly, so if you try such a hike, try and keep a good pace. We made a friend, Munyaka (who is a regular Hiker and is an expeditions Director and Team Building Coach at Black Hammock and the Managing Director at Bucket List Adventures). He is quite the fun guy and he kept us going with his jokes and his radio. Did you know that a simple radio could be so powerful when it comes to motivation?
There’s nothing like hearing Bob Marley’s “Could You Be Loved” blasting in the expanse of a mountain to get your ass up a massive rock.
Trust me.
The Jah spirit embedded in your African roots takes over your exhausted limbs and you’ll be shaking your head, index finger pointed in the air as you mash it up ‘pon the way! I also picked up on a few things, which, I thought I’d share with those of you who’ll feel inspired to try a similar hike;
1. Exercise!!!
I started jogging about two weeks to the Hike. Take it easy though, gradually build up the distance covered and your speed. (I strongly believe that I messed up my ankles running with the wrong shoes and starting out too hard, too fast).
Stretches are also very important.
I only had pain in my Quadriceps after the Hike. My hamstrings and calf muscles were pretty much OK. There are a couple of great YouTube videos that can get you prepped with good hike work-outs.
Be consistent with it.
The exercises will not eliminate the strain on your muscles during the hike, but exercising will most certainly make it much easier for you to in the very least, keep a good pace during the hike.
2. Shoes:
It is VERY important to get the right shoes. Your feet/legs will thank you for it. The right shoes will adsorb the impact of the work you will be doing while hiking; climbing over boulders and rocks can create pressure points which are the perfect catalysts for blisters, twists and muscular strains.
So, get the right shoes and give yourself the chance to enjoy the Hike and deal with the aches and pains after you’re done with the Hike.
Also, break in your shoes.
I’ve read this on many hiking forums and the Xtrym guys did insist on this tip.
Breaking in your shoes allows your feet and shoes to get better acquainted, this way you’ll get a chance to know where the shoe pinches and whether you should get a size bigger which is what is recommended. (I have pretty small feet and it wasn’t practical for me to get a size bigger because they would have been irksome for me to manage. So I got a pair of hiking boots that were just my size.
This is also because I don’t have sweaty feet and my feet aren’t the type to swell when it’s too hot or when enclosed for too long).
I wasn’t too sure about the shoes I’d picked because I literally dashed last minute to the Bata Weinbrenner section, asked for hiking boots in my size (you can guess what happened).
The sales agent then pointed me to these beauties (of course, at the Kiddie section) & I bought them on a whim, with a quick look at the sole, determining that they’d do and I went hugging and praying over them all the way home, hoping that they would pull through – and they did.
-

The greatest thing about shopping at the Kiddie Section? No laces!
Get a size bigger if your feet are not like mine. Break in your shoes by walking with them for a few KMs/Miles for a day or two before the hike and while wearing the socks you intend to wear on your hike.
Blisters will be your worst enemy on a hike. Blisters are the devil on a hike.
It is a horrific experience; this is the kind of stuff that can make a grown wail. Truthfully, I did not break in my shoes. (I should have) and I was pretty lucky I did not suffer blisters and that was maybe because …..
3. Prevention:
Protect your feet!
Tape your feet using some Band Aid and Leukotape (readily available in most pharmacies) to protect your big toes and little toes, the balls of your feet, your heel, soles and in-step as these are the most susceptible to blisters.
You do not want to get blisters.
Have I said that enough?
Be careful not to use tape/Band Aid that is not flexible, which may lead to tears = blisters on your skin. Also, do not tape too tight as this will cause friction = blisters.
I also used baby powder on my feet. Every time you’re on a break (you will have a couple of breaks on the hike), take off your shoes, wriggle your toes and let your feet breathe while you check for any soft/hot spots or skin tears and excess moisture as this are the pre-cursors to blisters. The baby powder will help keep the feet dry and will reduce the friction. Plus it just feels so nice. Really. It has a somewhat cooling effect.
And plus I just hate that yucky feeling when your toes clump together.
If you do break in your shoes, all that mama drama (above) will not be necessary. It was me, being extra extra cautious because I was not going to let myself have to deal with blisters that I could have prevented. I was determined to finish the Hike and finish strong.
Also, you will want to get the right socks. Long (past your ankles) which should be smooth and comfortable and preferably a pair that will adsorb moisture. I bought mine from Bata.
Oh yes, before I forget! Please clip your toe-nails. I did not and on the descent, as your feet will be inclined at an angle, your toes will frequently ram into the fronts of your boots and there is a high likelihood that your toe nails will crack and it is quite painful. (This is also a good reason to but shoes a size bigger).
Carry some sun-screen and wear a hat. You don’t want to be dealing with a molting forehead/skin (like me).
4. Pack Light!
Eeer, they told us 4 litres of water. I did carry 4 litres but my back pack was just too heavy and I only really needed 2.5 litres. I ended up pouring out most of the water just to reduce the weight of my backpack because the weight was becoming unmanageable and I could feel by shoulder blades burning.
So, I’d say know your body and how much water you may need.
I usually don’t drink that much water and granted during the hike I did need much more water than usual, I did not need all the 4 litres. Next time, I’ll carry smaller bottles to evenly distribute the weight. Be sure to carry enough. Dehydration can kill you.
Also, I admittedly packed a little more than I needed. (Apart from the Deep Heat, Deep Freeze, Anti-Histamine, Band Aid, Baby Powder and Ibuprofen). Carry some pain medication, I recommend Ibuprofen which works to manage pain and any inflammation.
Oh yes, and pack some little snacks apart from what you’ll chow down for lunch.
You’ll get a case of the munchies and a little biting on the “health breaks” will keep you going.
-

On the last break before we tackled the ascend to the summit. I attacked Eric’s Nyama Choma flavored Urban Bites here. (And, No, I didn’t leave that white plastic bottle of empty yogurt there).
5. Faith
Yes!!
Bring with you an energized spirit and be ready to push yourself.
No – one out there will do the hike for you.
It is purely you and your God and your ability to move.
Encourage yourself.
Build yourself up when you feel defeated (and at some point you will).
I caught the “Are we there yet?” bug. You will need to re-focus your energy on your body and listen attentively to it.
Take a break when you need to and this is better when you have company so I don’t advocate doing a hike by yourself if you’re a newbie, because getting left behind and subsequently lost is very easy. Keeping a steady pace is paramount and to do this, you literally have to have Faith that you will pull through the hard sections and that you will finish the Hike.
Having company also assures that your spirit will be uplifted and knowing that someone is there with you is sweetly comforting. And it is also important in keeping pace and following the lead of hikers gone ahead of you. Diana, Eric and I helped each other quite often along the way, especially when the large groups broke off into threes and fours and we found ourselves alone for the better part of the hike, keeping up a few paces behind the lead pack. (Except the part where Eric almost lead us off a cliff, and me, chanting Frodo! behind him almost got me “shot” by a worn out Hiker who thought I was high on something stronger than a crazy adrenaline rush!)
The feeling I got after completing the Rim Challenge is remarkable.
You want this feeling.
Celebrate each and every one of your victories in Life. However small.
Take little moments to side-track from routine, from everyday monotony.
Let your spirit breathe a little.
Discover new strengths and weaknesses.
Collect memories, not things.
*****
So, a picture is worth a thousand words, right? Feast your eyes!
(The pictures are courtesy of Eric, did I mention he’s a budding photographer? And Diana too. I didn’t touch Eric’s darling. Eric’s sweet Canon D500. I have a serious case of butter fingers)
-

Eric & I at the arrival at the Mt. Suswa Conservancy. (This must have been the point when all the butterflies rushed to my head).
I don’t know if you can tell from the pic below, but majority of the hikers are women. I noticed this because in our bus, we only had 8 men to 17 women, and the ratio was pretty much the same in all the other buses. Says something, doesn’t it?
Who run the world??
GIRLS! (Cue in Mrs. Carter now, won’t you?)
-

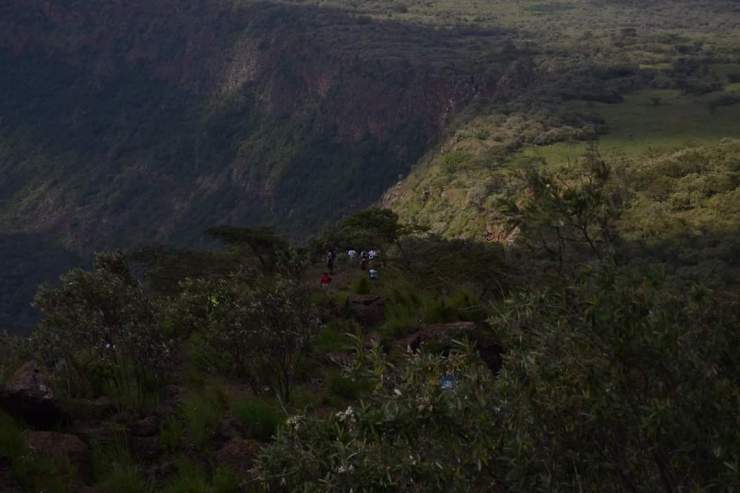
The full team of Hikers. We were about 100 I think.
-

The start….
-

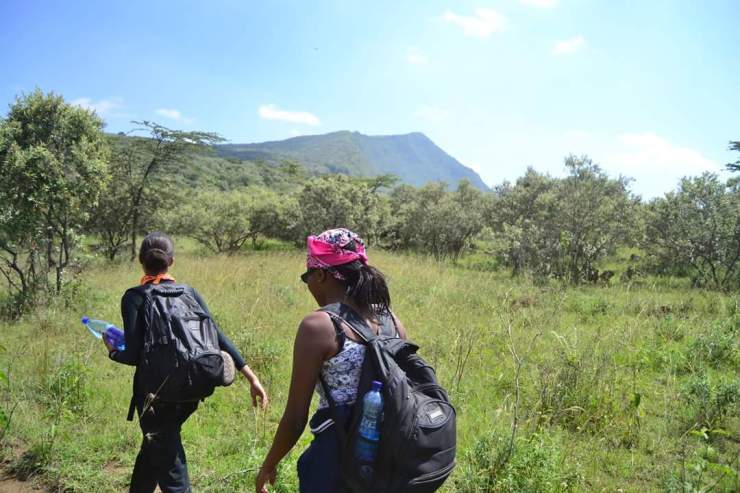
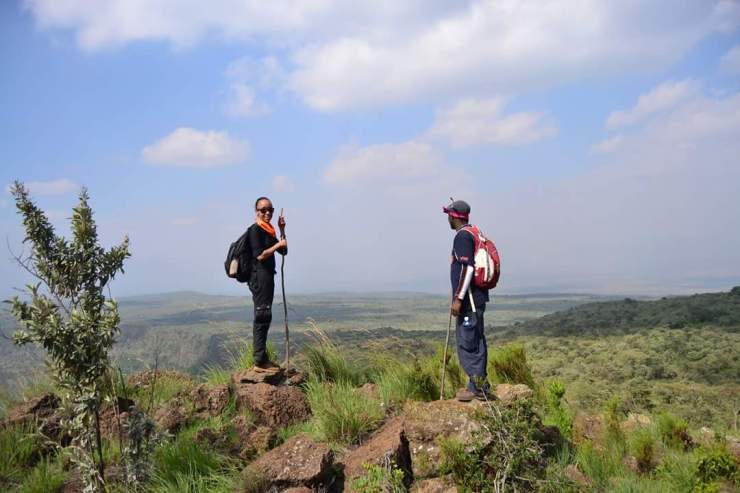
A view of the Summit from the start of the Hike.
-
A quick hesitant look at the summit, where we had our lunch at app. 1630 hrs
-

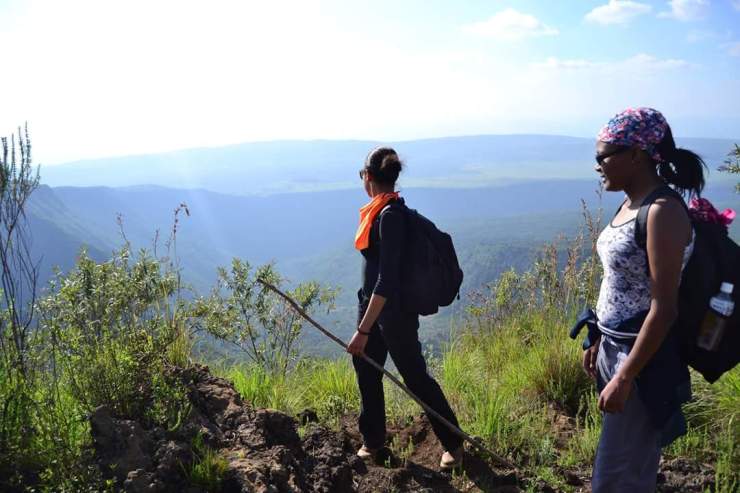
Diana & I at the Ridge.
-
You have to stop and take it ALL in.
-

To the Summit (& beyond!)
-
Doesn’t it look like a scene from Game of Thrones? The Lord of the Rings?No?
-
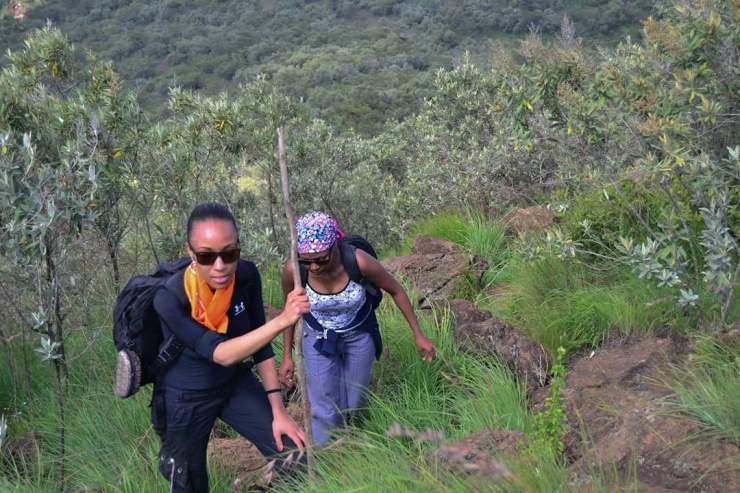
Putting in that work, onward march to that darned Summit
-

Absolutely exhausted at this point. I think I was praying for my soul.
-

Lunch, FINALLY!! We made it to that elusive Summit!!
-
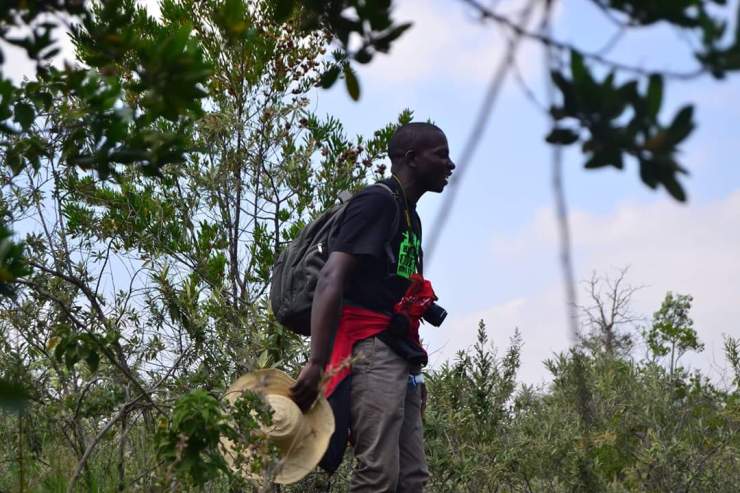
The famous Munyaka at the Summit
-

Weird; I cannot tell if this is to the summit or on the descent.
-

The descent.
-
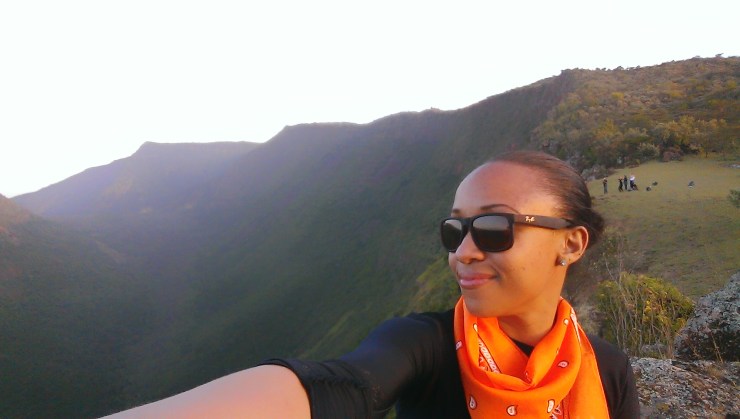
Victory Selfies. Finally done at 1830 hrs. Love that view
-

We love Selfies with No Filter, with such a view. Really hard to resist.
-

Before the pain in my quadriceps checked in and before the Adrenaline wore down, I celebrated the finish! Can I get an AMEN?
-

And then Munyaka happened. (We looove his spirit).
Oh, did I mention there’s another hike? Elephant Hill.
You bet I signed up for it.
Diana took the liberty of mentioning, oh so casually, that this Mt. Suswa Hike was a walk in the park and that Elephant Hill should put the fear of God in me.
But we have a nice pair of sunglasses, Ibuprofen and Munyaka’s trusted radio.
Wait, are you doing Elephant Hill Munyaka?

woohoo… looking good!
LikeLiked by 1 person
Cool shades………..
LikeLike
I know a guy… 🙂
LikeLike
Well said! Hope there’ll a blog post for every hike…
LikeLike
Yes, that is the plan…. Hoping to stick to it. The Elephant Hill Hike is in a few days, so look out for that post.
Thanks for stopping by!
LikeLike
Thank You.
I plan to write often..
*crossing fingers*
LikeLike